Get to know NAT on Mikrotik and how to configure it


Exactly what is NAT?? Network Address Translation (NAT) is the process by which a network device, usually a firewall, assigns a public address to a computer (or group of computers) on a local network. The main use of NAT is to limit the number of public IP addresses an organization or company uses public IP, either for economic or security purposes.
There are other uses for Network Address Translation (NAT) beyond just allowing workstations with internal IP addresses to access the Internet. In a large network, several servers can act as Web servers and require access from the Internet. This server is assigned a public IP address on the firewall, allowing the public to access the server only through that IP address.
However, as an additional layer of security, a firewall acts as an intermediary between the outside world and the protected internal network. Additional rules can be added, including which ports are accessible on which IP addresses. Using NAT in this way allows network engineers to route internal network traffic to the same resources, and allows access to more ports while limiting access to firewalls. It also allows detailed logging of communications between the network and the outside world.
Additionally, NAT can be used to allow selective access outside the network, too. Workstations or other computers that need special access outside the network can be assigned specific external IPs using NAT, which allows them to communicate with computers and applications that require a unique public IP address. Again, the firewall acts as an intermediary and can control sessions in both directions, limiting port and protocol access.
NAT is a very important aspect of firewall security. This reduces the number of public addresses used within an organization and allows for tighter control of access to resources on both sides of the firewall.
How To Properly Configure A Network With A Mikrotik
what distinguishes it from the previous post is only the IP that I use on the client, namely; for client 1 : 10.9.0.0/24 while for client 2 : 192.168.80.0/24
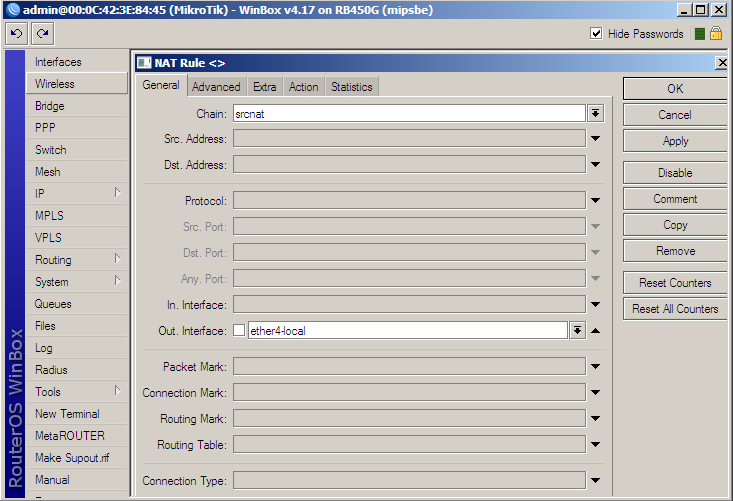
if it's finished, then what we do next configure the port used for output to the internet, and what I use is ether-4 local. After connecting from the output of the proxy to the network, then from Winbox select the IP menu, and select DHCP Client.
then the display will appear as below:
.PNG)
If the interface has not appeared, then click the (+) sign at the top left of the display to add a new DHCP Client. according to the port used, as shown in the following image:
.PNG)
.PNG)